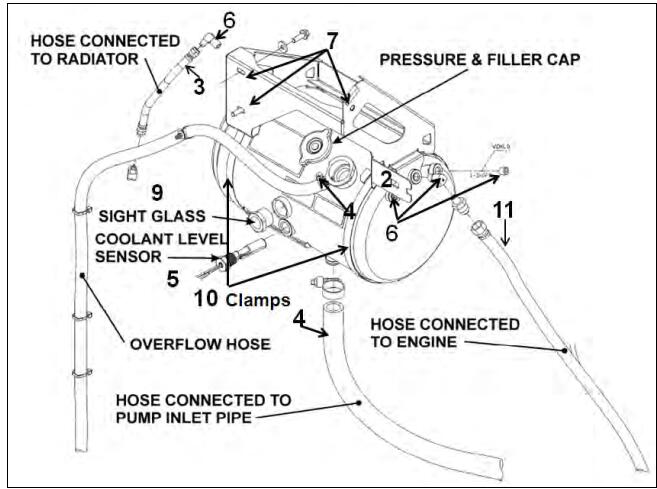
This instruction how to improved coolant surge tank for Volvo X3-45 coaches 2011-2013.This new surge tank offers a greater quantity of coolant between the low level sensor and the middle of sight glass level (5.2 quarts instead of 2.3 quarts). You will benefit from less frequent low coolant alarms. More about Volvo repair,please refer to:Volvo Truck Repair
What You Need?
Danger:
Park vehicle safely, apply parking brake, stop engine and set battery master switch(es) to the OFF position prior to working on the vehicle.
REMOVAL OF THE ORIGINAL COOLANT SURGE COOLANT SURGE TANK
1.Cut the tie wrap holding the DEF lines to the coolant surge tank bracket.
2.Disconnect each hose connected to the coolant surge tank.
3.Place a clean rubber tube into the coolant surge tank. Using siphon effect, drain coolant surge tank.
4.Remove tie wraps and unplug low level sensor connector (5).
5.Loosen all fittings and sight glass.
6.Remove 3 bracket bolts (7) and remove coolant surge tank and bracket. Pull the coolant surge tank through the SCR converter.
7.Turn the tank in order to have the level sensor at the top, in a vertical position and then unscrew it from the coolant surge tank.
8.Remove sight glass and all fittings from coolant surge tank.
9.Loosen band clamps (10) and separate coolant surge tank from bracket. Return to Prevost for full reimbursement.
NEW COOLANT SURGE COOLANT SURGE TANK ARRANGEMENT
Note:
Use Loctite 567 Thread Sealant on all NPT threads (Prevost #680098)
Note:
There is no specific tightening torques except when specified
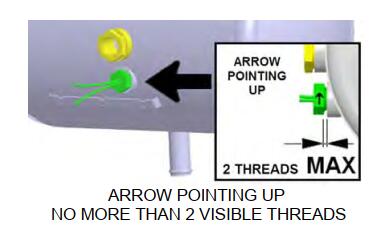
1.Using Loctite Thread Sealant 567 on threads,install level sensor in new coolant surge tank with sensor in a vertical position at the top of the tank. Tighten so that arrow on the side of the sensor is pointing up. Leave no more than two visible threads.
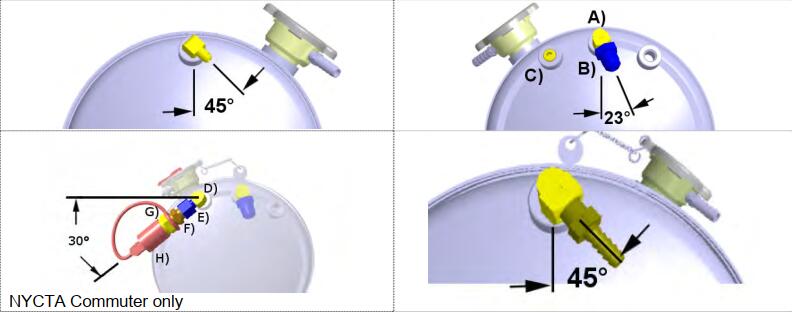
2.Install all hose fittings and sight glass using Loctite 567 Thread Sealant
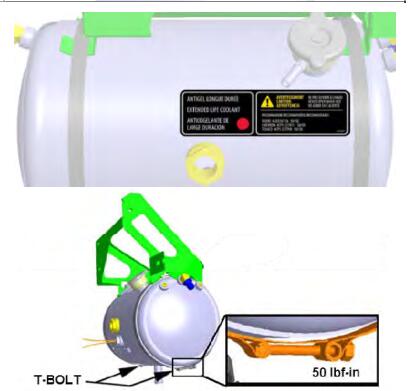
3.Affix decal #053597 on surge tank. For NYCTA Commuter coaches, affix decal #053625 in addition.
4.Fix surge tank onto support. Tighten T-bolt clamps to 50 lbf-in.
5.Install coolant surge tank and support assembly in engine compartment. Tighten bolts to 16 lbf-ft.
6.Install all hoses and tighten properly.
7.Secure two DEF lines to tank support with tie wrap.
8.Use the cap from the original surge coolant surge tank on new surge tank.
9.Fill coolant surge tank to midpoint of sight glass and pressure test system. Close the heating system shut off valves to isolate this part of the system. Proceed to pressure test with 14 psi. Pressure should remain the same. Test for 5 to 10 minutes.
10.Run the coach and check coolant level once again.
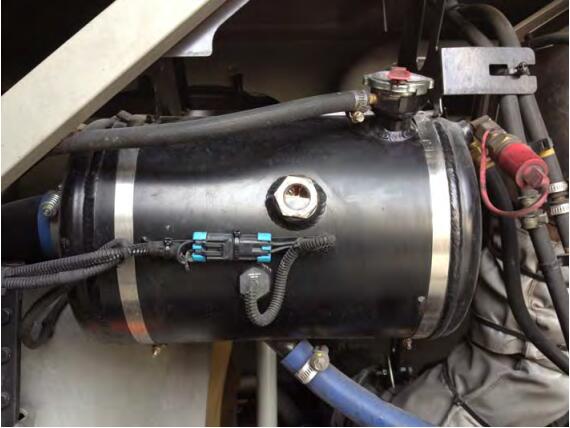
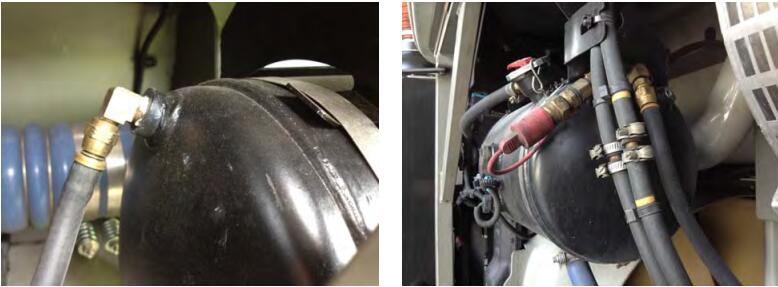
NEW COOLANT SURGE COOLANT SURGE TANK INSTALLLED
NEW COOLANT SURGE COOLANT SURGE TANK INSTALLED – ROAD SIDE

