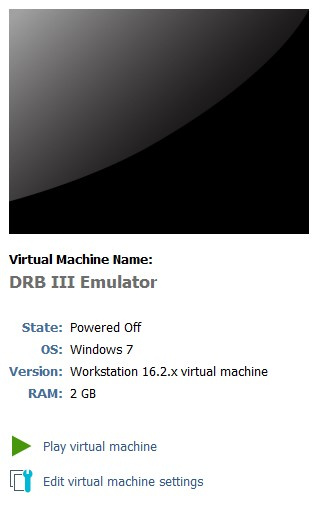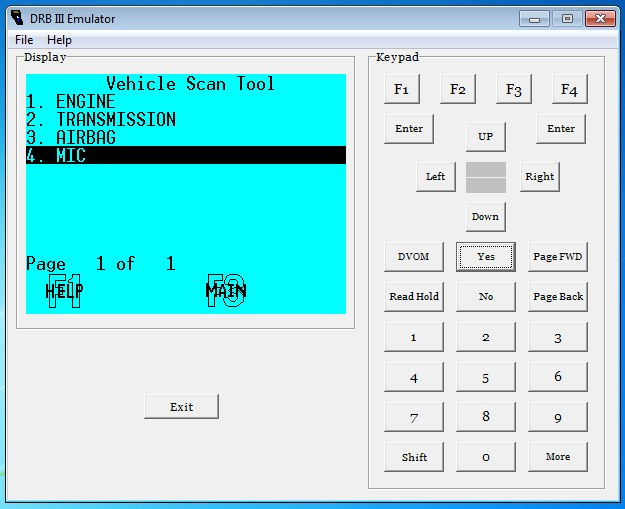
This how-to will show the steps to set up the DRB III Emulator on your PC using a Virtual Machine (aka ‘VM’). One of the limitations of the emulator is that it must not have internet access, which means it can’t be installed on your PC (unless you want to switch off internet access, and I’m sure you don’t). The options are to use a dedicated PC or a VM.
These instructions are not mine, I have cribbed them from multiple places on the internet and put them together in one place.
Use the contents of this how-to at your own risk! You could damage the Micropod 2 and/or your vehicle. You have been warned.
V17.04.27 wiTech MicroPod 2 for Chrysler Diagnosis & Programming Multi-language
This is the best version wiTech MicroPod 2 for Chrysler group vehicles, software is V17.04.27, supports diagnostic and programming online, with Multi-language, provides 100% CAN coverage for Chrysler, Dodge, Jeep.
1. Download and install VMWare Workstation 16 Player
https://www.vmware.com/content/vmware/vmware-published-sites/us/products/workstation-player/workstation-player-evaluation.html.html
2. Download the Windows 7 32-bit ISO from here:
https://archive.org/details/Windows7SP1ENGAIOx86x64
3. Get a Windows 7 Professional 32-bit product key from here:
https://www.partitionwizard.com/partitionmanager/activate-windows-7.html
4. Create a new VM called “Windows 7 Scratch 32-bit” using the ISO and the product key. Set the memory to 2GB by customizing the machine.
All the following steps are in the VM.
5. Download and install the Chrome browser
6. Search the web for KB3138612 from Microsoft, download, install and reboot.
7. Check for Windows updates to get the service packs. Install all of the updates Microsoft offers.
8. Optional: install VMWare Tools. Not needed but makes life a lot easier. For example once installed you can resize the VM window and drag and drop files from your PC to the VM desktop. Download the ISO from here:
https://packages.vmware.com/tools/esx/latest/windows
and mount as a CD drive in the machine settings, then run the installer.
9. Close the VM and make a copy of it called something like “DRB III Emulator”. Keep the scratch version somewhere safe in case you need it again as a new starting point.
10. Start the new VM.
11. The CD that comes with the Micropod2 clone may not have the DRB III emulator on it. There are reports that they stopped including it, however someone on another forum has uploaded the contents of their CD here:
https://drive.google.com/file/d/1xwM8T0_tKyh2JUrNtP2ib-yYt1fIuqDs/view?usp=sharing
Here are the file listings in case you don’t want to download from that link but rather search elsewhere for the same contents:
31/05/2023 21:16 <DIR> .
31/05/2023 21:16 <DIR> ..
16/12/2017 03:50 <DIR> DRBIII emulator
21/02/2017 21:39 8,673,298 WiTECH Install video.exe
16/12/2017 03:48 <DIR> wiTECH_Install_17.03.01
16/12/2017 03:47 <DIR> wiTECH_Install_17.04.27
1 File(s) 8,673,298 bytes
5 Dir(s) 216,727,408,640 bytes free
Directory of D:\DRB III\wiTECH_Install_17.04\wiTECH_Install_17.04.27
16/12/2017 03:47 <DIR> .
31/05/2023 21:16 <DIR> ..
08/10/2015 13:47 18,509,368 AdobeAIRInstaller.exe
08/10/2015 13:45 17,090,992 jre-6u45-windows-i586.exe
28/09/2016 02:28 174,466 Read me.pdf
24/05/2017 19:45 806 wiTECH_Install_17.04.27 Software and considerations.txt
20/05/2017 08:09 829,910,936 wiTECH_Install_17.04.27.exe
5 File(s) 865,686,568 bytes
2 Dir(s) 216,727,408,640 bytes free
Directory of D:\DRB III\wiTECH_Install_17.04\DRBIII emulator
16/12/2017 03:50 <DIR> .
31/05/2023 21:16 <DIR> ..
11/12/2017 22:02 22,295,360 Drb Enhanced Emulator Setup 01-11-2017.exe
02/09/2016 05:38 17,232,785 Drb Enhanced Emulator Setup 09-02-2016.exe
11/02/2017 02:14 22,254,701 Drb Enhanced Emulator Setup 18-01-2017.exe
07/09/2017 22:22 22,294,004 Drb Enhanced Emulator Setup 22-08-2017.exe
02/09/2016 05:37 16,228,666 DRB III Emulator Setup 1.09.0001.exe
02/09/2016 05:39 3,856,592 DRB Stub Installer.exe
02/09/2016 05:39 3,856,672 Enh DRB Stub Installer.exe
7 File(s) 108,018,780 bytes
2 Dir(s) 216,727,408,640 bytes free
Directory of D:\DRB III\wiTECH_Install_17.04\wiTECH_Install_17.03.01
16/12/2017 03:48 <DIR> .
31/05/2023 21:16 <DIR> ..
08/10/2015 13:47 18,509,368 AdobeAIRInstaller.exe
24/05/2017 20:05 293 Install .txt
08/10/2015 13:45 17,090,992 jre-6u45-windows-i586.exe
28/09/2016 02:28 174,466 Read me.pdf
18/12/2016 08:41 827,030,864 wiTECH_Install_17.03.10.exe
5 File(s) 862,805,983 bytes
2 Dir(s) 216,727,408,640 bytes free
Click to expand…
12. Unzip and copy the folder wiTECH_Install_17.04 to the desktop of the VM.
13. Go into the folder wiTECH_Install_17.04.27
14. Complete steps 5 to 20 but using wiTECH 17.04.27 instead of 17.03.01.
If the stubs fail to update (steps 15, 17 and 19) then this doesn’t seem to be an issue.
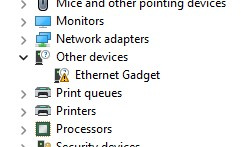
15. Connect the Micropod 2 to your PC and make sure it appears in the device manager as “Ethernet Gadget”.
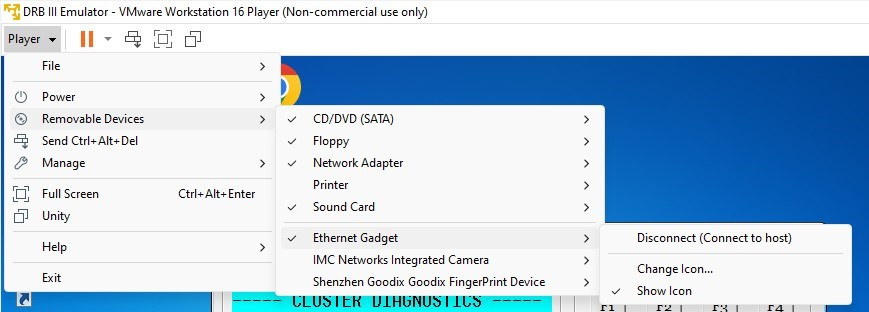
16. In VMWare Player click on the Player menu -> Removable Devices -> Ethernet Gadget -> Connect. Do not choose the option to automatically connect the device to the VM in the future, that only causes USB problems.
17. Complete steps 21 and 22
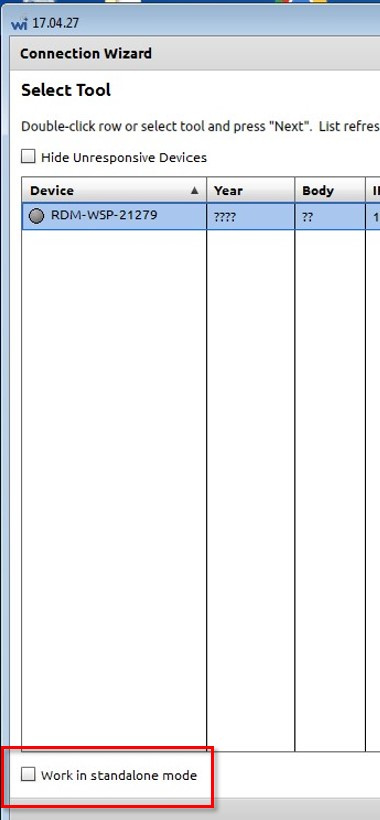
18. In wiTECH check Work in Standalone Mode then Next
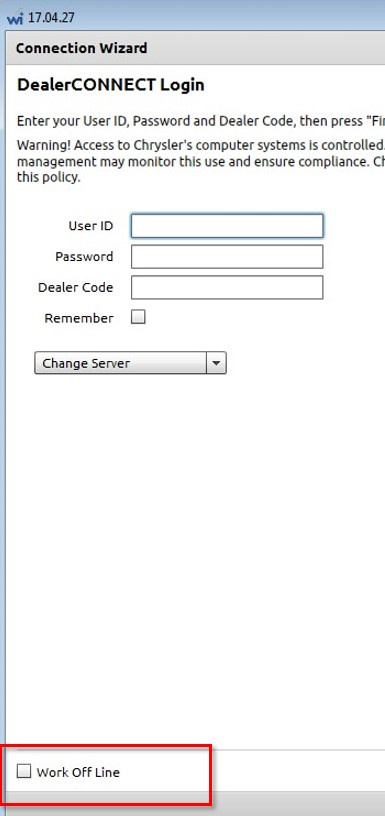
19. Click on Work Off Line then Finish.
20. Close wiTECH
21. Complete steps 23 and 24
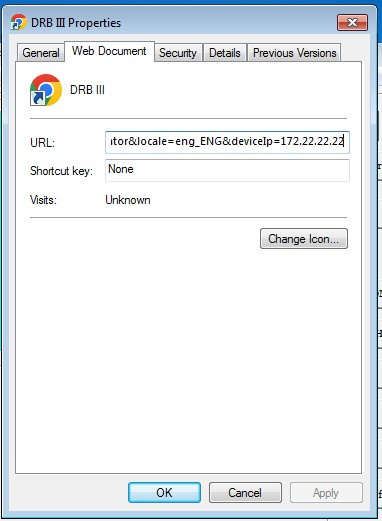
Creating the shortcut:
Internet disabled:

22. Run Drb Enhanced Emulator Setup 22-08-2017.exe
23. Complete step 25
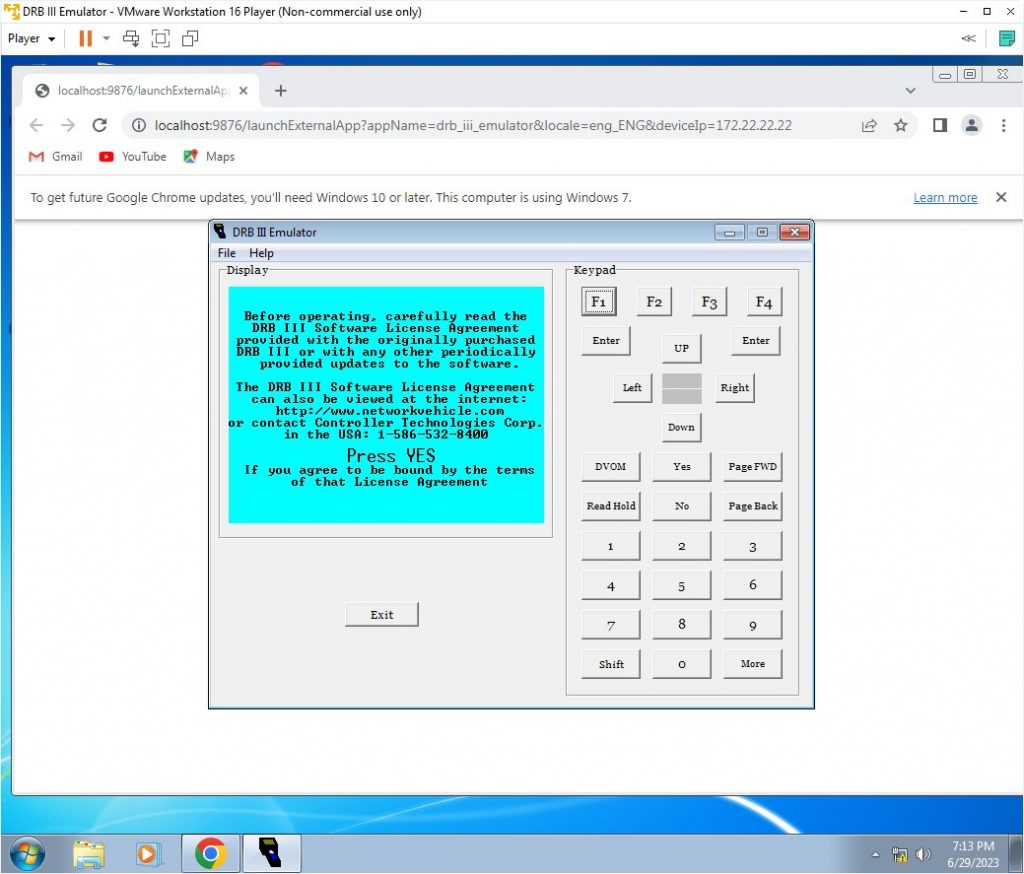
Here is what the browser window looks like when you click on the shortcut:
then the DRB III Emulator application will appear on the taskbar:
At this point Chrome can be closed.
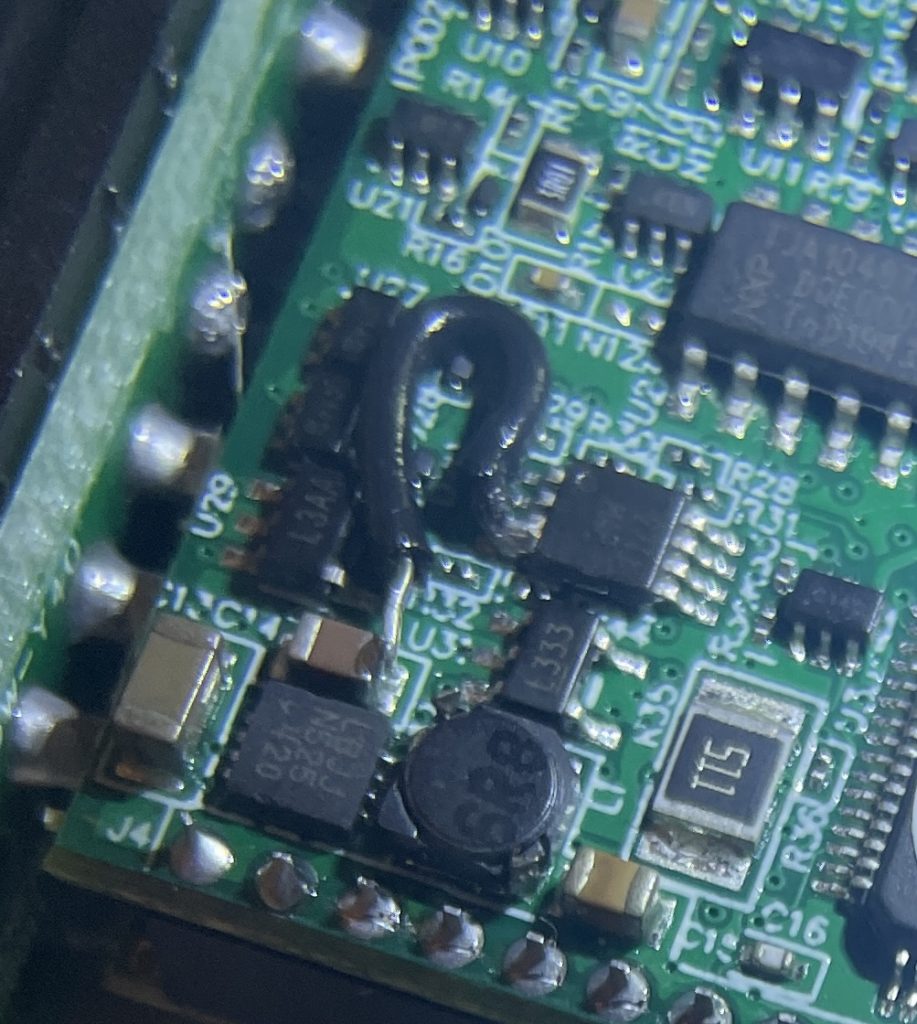
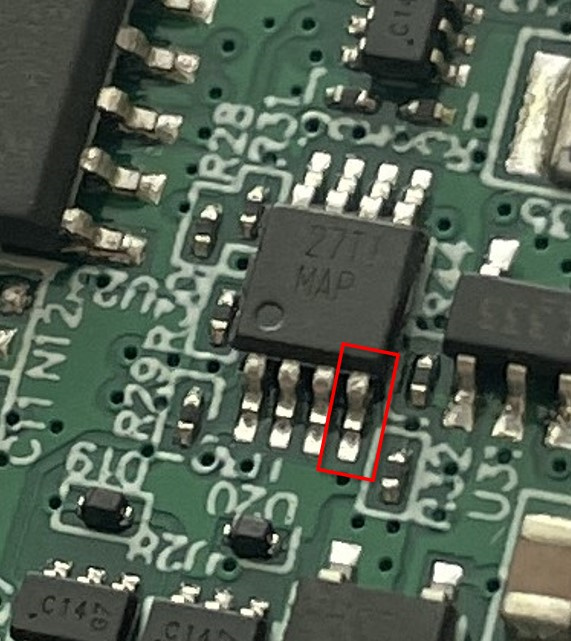
Some (most?, all?) Micropod 2 clones have a circuit board flaw. There is a chip variously marked as “27 TI MAP”, “55 TI MAP”, “65 TI MAP”, etc. that has a pin which should be connected to ground but isn’t. This flaw stops the PCI bus from being accessible. The result is that the PCM can be seen but not other modules.
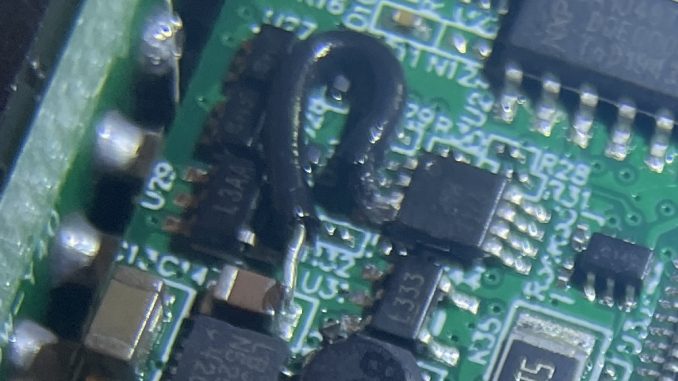
Fixing this required some delicate soldering. There are a couple of different ways but I decided to solder a wire from pin four of the chip to a point where there is ground.
Here is the board before modification. The red box is the pin that needs grounding.
Here is the board after modification. I’ve added a wire from the pin to the nearby capactor.
A DRB III manual can be found here:
https://www.colorado4wheel.com/manuals/Jeep/DRB_3_Features_Menus.pdf
Some screenshots.
